WebPainter was designed to provide Web designers with an easy-to-use solution for creating Web animations and animated GIF graphics. In this tutorial we will create a small 'bouncing ball' animation and export it to Sizzler and animated GIF formats. You will then add these animations to your Web page using a Web authoring tool and some basic HTML code.
Go to the folder named WebPainter and open the folder. Double-click on the application icon "WebPainter."
The icon looks like this.
![]()
Fig 1. WebPainter application icon
The New Document Dialog (Fig. 2) will show when you double click the icon.
Step 1: Change the Document Settings
In the new Document dialogue box you can change the document size settings. For our "Bouncing Ball" animiation,
change the settings to 200 for the width and 160 for the height. Click OK
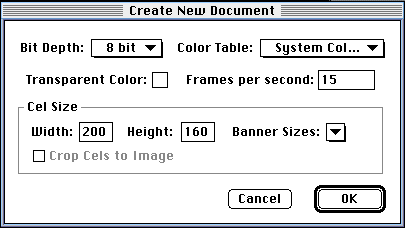
Fig 2. Create New Document Dialog
A new cel document window will appear with the first cel in it.
Step 2: Choose the Palette from the Windows Menu
We need to make a number of palettes available. Choose the Paint
Tools, Color Tools, and Controller palette from the Windows menu. You can choose the paletes that suit your needs.
Set the
tools up as shown or what position you want them in. As you will notice the Paint Tools is similar to
many popular painting applications on the Macintosh.
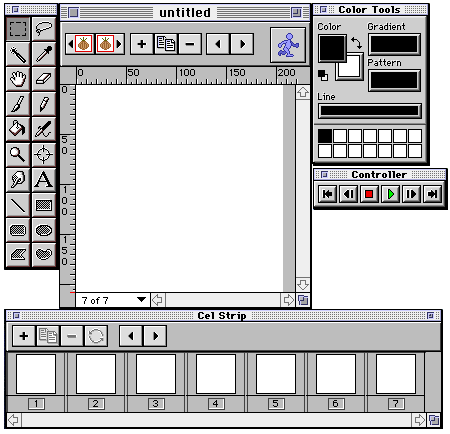
Fig 3. Setting up the palettes window in position
Step 3: Set the Registration Point for the Animation
You will need to set a Registration point![]() to help position the "Bouncing Ball". Select the Registration tool from the Paint tool palette and
positionit in the lower-mid section oif the document window. Click to make the Registration point appear
to help position the "Bouncing Ball". Select the Registration tool from the Paint tool palette and
positionit in the lower-mid section oif the document window. Click to make the Registration point appear
NOTE: The use of a registration point is optional to the users. Deselect the registration point item from the Paint Menu to remove.
Step 4: Create the 1st cel of the blue ball
Select a blue color from the Colors palette. Select the Circle tool from the Paint Tool palette.
Click on the document window and using the circle tool draw a round ball as shown in Fig.6
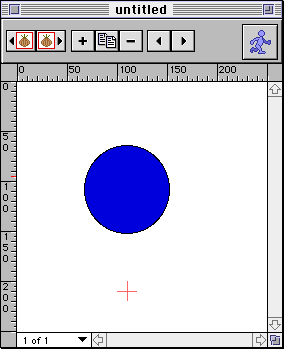
Fig 6. Creating the 1st cel of the blue ball with the circle tool
Step 5: Create the 2nd cel of the blue ball
To create the next cel, you want to duplicate cel 1 by clicking on the duplicate button![]() .
It should say 2 of 2 in the bottom left corner of the
active document window.
.
It should say 2 of 2 in the bottom left corner of the
active document window.
Now click on the Onion-skin Previous button![]() to see a ghosted image of the first cel.
to see a ghosted image of the first cel.
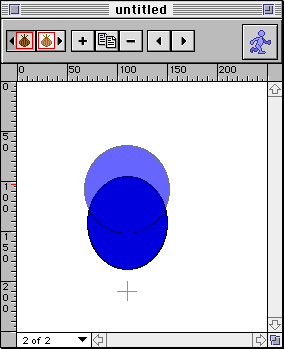
Fig 7. Creating the 2nd cel of the blue ball with the circle tool
With the Lasso tool select the blue ball in cel 2, move the selected blue ball down towards the bottom allowing the ball to overlap one quarter of the ghost image of cel 1. This will make the ball appear to be moving downwards.
Step 6: Create the 3rd cel of the blue ball
Duplicate
cel 2 for cel 3. Use Onion-skin Previous to see a ghosted image of the second cel.
Use the ghosted image and the registration
point to reference to change cel 3. Similar to Step 5, select the blue
ball and move it down to cover one quarter of cel 2's ghost image.
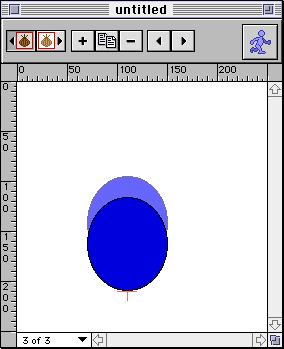
Fig 8. Creating the 3nd cel of the blue ball with the circle tool
Step 7: Flattened the ball to simulate the landing.
Draw a flattened ball or oval to immitate a ball hitting the ground. Using onionskinning previous and the registration
point, position the ball at the bottom of the cel.
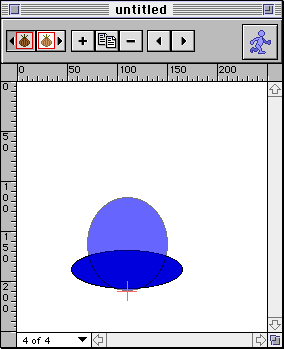
Fig 9. Creating the 4th cel of the blue ball with the circle tool
Step 8: Using the cel strip window.
The cel strip allows you to see the progression of the animation cel by cel. You can duplicate, add or delete
a cel or series of cels from the cel strip window.
Open the cel strip window from the "Windows Menu Option".
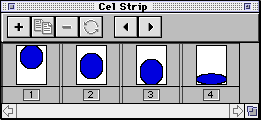
Hilite frame 2 in the cel strip window. Using the "Shift" button on the keyboard, also hilite cel 3. Hit the "Duplicate" but on the top of the cel strip window. WebPainter should of created two identical cels beside cel 3. (Note: You will notice the squashed ball that was in cel 4 is now in cel 6. By duplicating the cels you just pushed the cels over, you did not write over other cels.) Drag these 2 new cels so that they are positioned after cel 6. Now with the "Rotate button", flip the order of the 2 new cels. Your cel strip window should look Fig.10.

Fig.10 Cel strip window with new cels.
The reason we just did that was to familiarize you with the animating trick of re-using cels. Even though it would have been easier to just draw the circles in frame 4 and 5, the process shows that for similar cels, you can use the duplicate and rotate tools to save time drawing.
Since we are creating a looping animation we don't want to have 2 cels the same. If we also duplicated cel 1, it would appear like there was a pause at the top of the bouncing ball's path.
Step 9: Viewingyour animation.
You have now created a bouncing blue ball.
Turn off Onion-skinning. Click on the play button in the "Controller Window"
to view the animation.
Tip: To create a more realistic animation you can add a shadow to accompany each of the above cels. The shadow will appear underneath the ball as an oval shape that will be smaller when the ball is high and larger and flatter as the ball hits the ground.
Fig 10. You just created your first animation.
In order to reduce the size of the animation you should crop the document window to the size of the animation. To do this
select "Document" from the menu bar and select
![]()
To learn more about the cel strip window,
Chapter 3 has a more
in-depth explanation.
What is the Sizzler format?
Sizzler is a multimedia player that allows you to view streamed based animations through a Web browser. Streaming
allows you to view animations in real time instead of waiting for the entire image to download before viewing completely.
Sizzler is compatible with the following browsers:
Step 11: Exporting to the Sizzler format.
Once you have created your animation, you need to export it to one of the file formats that Web browsers can view.
Choose Export from the File menu and select Sizzler Animation from the pull down
menu. A dialog box will appear. Type "25" in the Frames per second
settings.
WebPainter and Sizzler allows you to create interactive animations. For example, you can direct a user to a new URL when they click on the animation. In order to specify a new URL, type it in the field provided .
URL stands for Uniform Resource Locator. An URL is like a sign pointing to a specific hypermedia document on the Web. If you don't want the user to go to a specific page, leave the field blank.
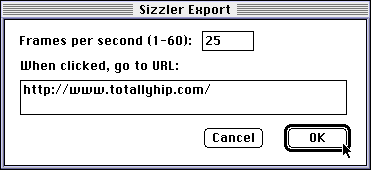
Fig 13. Sizzler Export dialog.
Step 12: Export the Sizzler sprite file.
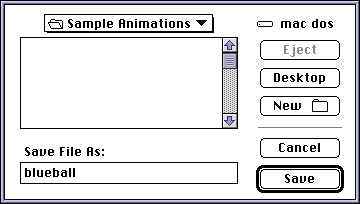
After you clicked OK, a dialog will appear. The exported Sizzler or sprite
file will be saved as the same name as the animation by default and will have a ".sprite" extension.
You need to save this sprite file in the same folder as the HTML
page that you want your animation to appear. The sprite file needs to be
in the same folder as the HTML document in order for the animation to play.

Fig 14. Saving Sizzler file dialog.
"EMBED SRC="blueball.sprite" WIDTH=130 HEIGHT=138>
If you change the name of the Sprite file, also change the name of the EMBED tag to match.
Next a dialog box will ask whether you want to save the HTML EMBED tag for the "blue ball bounce' sprite file to a text document. The EMBED tag will be automatically stored on the clipboard but the export function will also store it in a text file in case the clipboard becomes deleted.
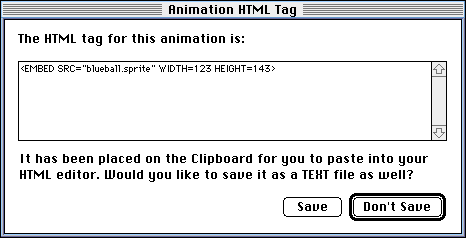
Fig 15. Saving sizzler's HTML tag dialog.
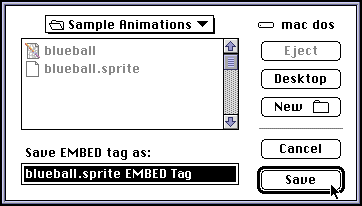
Fig 16. Saving Sizzler's HTML tag dialog.
Step 14: Inserting the HTML EMBED into your document.
Paste the HTML EMBED tag from the Clipboard into your HTML document. It
must be placed in the area you wish to have your animation played.
"EMBED SRC="blueball.sprite" WIDTH=123 HEIGHT=143>
Note: In order to publish sprite files on a Web server you must configure the HTTP server to recognize the Sizzler sprite files. This is done by defining a MIME type. The MIME type for sprite files is "application/x-sprite". Once your server knows this, it will recognize sprite files and will allow you to publish them on your Web page.
If you are using a remote server through an Internet Service Provider you must contact them and supply the information outlined in the readme file called "Configuring Your Server" in the Sizzler for Macintosh. The readme contains detailed specifications and instructions for a variety of servers and platforms.
Note: Export to GIF Animation
Steps 11-15 are instructions to export Sizzler animation. For export to
GIF animation, replace the above steps with the ones below.
GIF stands for Graphical Interchange Format. GIF is a popular Web graphics format because of its use of an efficient compression method. To export WebPainter Animation as GIF Animation, simply select export to Animated GIFs under the "Export" submenu of the "File" menu.
To add GIF animation to the Web Page, simply paste the Animated GIF tag from the Clipboard into your HTML document, the animation will play accordingly.
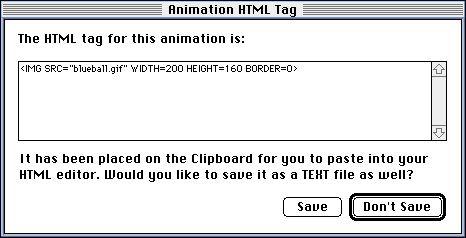
Fig 17. Saving GIF Animation's HTML tag dialog.
Congradulations, you have just created your first animation.
[Chapter 1: Installing]-[Chapter
2: Tutorial]-[Chapter 3: Tools, Palettes
& Documents]
[Chapter 4: Menus]-[Chapter
5: Document Settings]-[Chapter 6: Basic
Web Concepts]
[Appendix]